
If someone asked you how to rearrange photos on LinkedIn post? The answer would be very simple! During the process of uploading and adding photos to a LinkedIn post, you can click any photo you’d like to upload and drag them to select.
How to rearrange photos on LinkedIn posts after uploading? Is it possible?
But if you want to reorder photos after uploading and adding them to a LinkedIn post, as a matter of fact, it seems quite challenging and tricky. Or maybe it’s now unattainable!
So to find possible solutions to crack this problem, you need to follow our article and read about it below to learn how to do it.
To rearrange photos on LinkedIn post, you can do so by clicking and dragging the Reorder icon, which is located to the left of the image or photo you'd like to rearrange. By using this feature, you can easily adjust the order of the images within your post to better match your desired layout and presentation.
The importance of using photos on LinkedIn posts
LinkedIn is considered a very effective tool for professional networking. However, if you want to stand out among more than 850 million LinkedIn users who always attempt to make themselves look better and more professional, it isn’t so straightforward.
It’s no matter of concern! You just have to strive to be active on LinkedIn. But how?
To attract a plethora of audiences and expand your connections network, you should regularly create posts related to your business and interests, as well as share them with your network on LinkedIn and even other social media.
To make your posts more visible, it’s better to add images and videos to them.
Did you know that you can add multiple photos in a post in order to create an engaging experience for your audiences?
How to post multiple photos on LinkedIn?
To share and add multiple images to a LinkedIn post, you need to follow these steps:
1. In the post sharing box at the top of your LinkedIn homepage, click Start a post.

2. In the pop-up window of Create a post, and in the What do you want to talk about? box, enter your text.
3. In this window, click on the Add a photo icon to add your targeted images.

4. In the Edit your photo pop-up window, click the Select Images to share tab.

At this step, you’ll be directed to the Open window where you can choose the images you want from your computer in the order you’d like to share.

5. In the above window, click on the images you want to arrange in the LinkedIn post, then hold & drag them until they’re selected, and then click the Open button.
6. After uploading the images, click the Done button and finally click Post.

Hot tips that you should bear in mind:
- You can choose up to nine photos to share a post.
- The uploaded photos will appear on your post in the selected order.
- After you’ve uploaded and added photos on LinkedIn posts, you can’t rearrange them.

How to rearrange photos on LinkedIn posts after uploading them?
While you’re willing to share multiple photos in your LinkedIn post, you might make a mistake in uploading them in order.
However, it can be challenging and tricky for you when you don’t know how to rearrange photos on LinkedIn posts.
Then many times you endeavor to change the order of the photos, but unfortunately, LinkedIn doesn’t allow you to rearrange or edit images after uploading them in a post.
The only workaround that seems to work around this right now is to name the images you want to share alphabetically in advance and then opt for them in alphabetical order in a new post.
LinkedIn Carousel
As mentioned earlier, although currently, it’s impossible to rearrange images in LinkedIn posts, in the near future you’ll be able to do so without any trouble.
According to LinkedIn.com, this platform has decided to enable a new feature called “Carousel” as a fixed option and one of the sharing formats in its content post section for all users gradually.
With this new LinkedIn feature, you can easily share your visual content and meanwhile, you can add up to 20 photos to LinkedIn posts, and moreover, after adding them, you’ll be able to rearrange the photos by clicking on the Reorder option.
It’s interesting to know that now the Carousel feature is being rolled out in the feed of some users and so may not be available to you right now.
Be patient! After a short time in the near future, you and all LinkedIn members will definitely be able to take advantage of it, as well as no longer worry about how to rearrange photos on LinkedIn post!
Related Questions & Answers
How to add multiple photos on LinkedIn post?
To add multiple photos to a LinkedIn post, you can follow a simple process. First, start creating a new post by clicking on the “Start a post” field on your LinkedIn homepage. Then, click on the photo icon located at the bottom left corner of the post composer. This will allow you to select multiple photos from your computer or device. After selecting the photos, you can rearrange their order by clicking and dragging them. You can also add captions or descriptions for each photo if desired. Once you’re satisfied with the photos and captions, you can click the “Post” button to share your multi-photo post on LinkedIn.
How to create a carousel post on LinkedIn?
Creating a carousel post on LinkedIn is a great way to showcase multiple images or slides in a single post. To create a carousel post, start by clicking on the “Start a post” field on your LinkedIn homepage. Then, click on the image icon located at the bottom left corner of the post composer. Select the images or slides you want to include in the carousel by clicking on them. You can add up to 10 images or slides in a carousel post. Once the images are selected, you can rearrange their order by dragging and dropping them. You also have the option to add captions or descriptions for each image or slide. Finally, click the “Post” button to share your carousel post with your LinkedIn network. Carousel posts can be a powerful tool to engage your audience and tell a visual story on LinkedIn.
How do I post multiple pictures in a sequence on LinkedIn?
Posting multiple pictures in a sequence on LinkedIn is a great way to share a visual story or showcase a series of images. To do this, start by creating a new post on LinkedIn. Click on the image icon in the post composer and select the first picture you want to include. Once the picture is uploaded, click on the image icon again and select the next picture in the sequence. Repeat this process until you have added all the pictures you want to include. LinkedIn will automatically arrange the pictures in a sequence, and you can click on each picture to view them in a carousel format. You can also add captions or descriptions for each picture to provide context or additional information. Once you are satisfied with your post, click the “Post” button to share it with your LinkedIn network. Posting multiple pictures in a sequence can help you engage your audience and tell a visual story effectively on LinkedIn.
Can you change photos on LinkedIn posts?
Yes, you can change photos on LinkedIn posts if you need to update or replace an existing image. To do this, navigate to the post that you want to edit on your LinkedIn profile. Click on the ellipsis (…) icon in the top-right corner of the post and select “Edit post” from the dropdown menu. In the post editor, locate the image that you want to change and click on it. This will allow you to upload a new image from your computer or choose a different image from your LinkedIn photo gallery. After selecting the new image, make any other necessary edits or changes to the post, such as updating the text or adding tags. Once you are done, click the “Save” or “Post” button to update the post with the new image. Keep in mind that changing the photo will replace the previous image, so make sure you have the desired replacement ready before editing the post.
How do I customize my LinkedIn post?
To customize your LinkedIn post, start by creating a new post by clicking on the “Start a post” box on your LinkedIn homepage or profile. In the post composer, you can customize your post in a few different ways. First, you can add text by typing directly into the text box. You can also format your text using options such as bold, italics, and bullet points. Additionally, you can attach files, images, or videos to your post by clicking on the respective icons in the composer. If you want to tag someone in your post, simply type the “@” symbol followed by their name, and LinkedIn will suggest connections or company pages that match the name. Finally, before publishing your post, you can choose the visibility settings by clicking on the “Anyone,” “Connections,” or “Public” buttons. Once you are satisfied with the customization, click the “Post” button to share it with your LinkedIn network. Remember to review your post for accuracy and appropriateness before publishing.
How do I add multiple pictures to a single post on LinkedIn?
To add multiple pictures to a single post on LinkedIn, you can create a photo carousel. Start by clicking on the “Start a post” box on your LinkedIn homepage or profile. In the post composer, click on the image icon to add your first picture. Once the picture is uploaded, you will see a small thumbnail at the bottom of the composer. Click on the “+” icon next to the thumbnail to add another picture. You can continue this process to add multiple pictures, up to a maximum of nine. Each picture will appear as a slide in the carousel. You can also add captions or descriptions for each picture by clicking on the text area below each slide. Once you have added all the pictures and any desired captions, click the “Post” button to share the photo carousel with your LinkedIn network. This allows you to showcase multiple images in a single post, creating a visually engaging experience for your audience.
Where Is the Reorder Icon on LinkedIn?
When you’re looking to rearrange the order of positions within your LinkedIn Experience section, locating the reorder icon is the first step. This icon, denoted by three horizontal lines, can usually be found nestled in the top right corner of your position, indicating its functionality in facilitating the reorganization of job roles.
Can You Edit Photos on LinkedIn Posts?
No, you can only edit the text within a post. Rich media, like photos that have been shared, cannot be edited on LinkedIn posts.
If you need to modify shared rich media, you’ll have to delete your current post and make a new one.
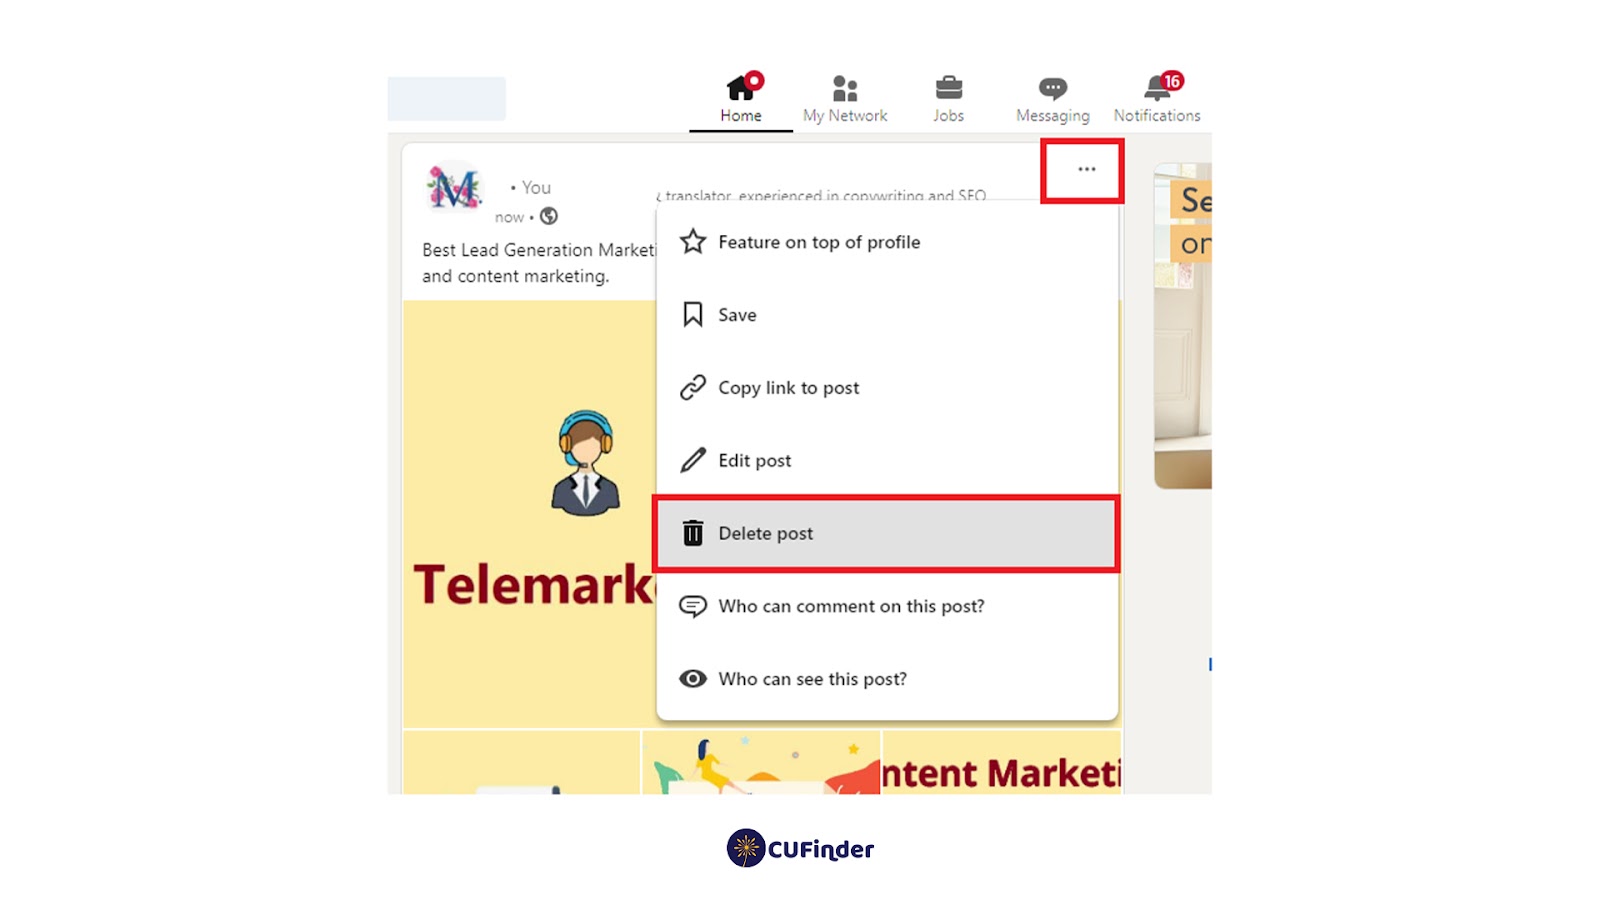
How to Replace Photos on LinkedIn Posts?
If you want to replace a photo in a LinkedIn post with a different one, you have no choice but to delete the current post. Simply go to the post containing the photo you intend to replace, click the three dots in the right corner of the post, select the Delete post option, and then create a new post with your desired images.
How to Delete Photo from LinkedIn Post?
Deleting a photo from a LinkedIn post can be efficiently accomplished through a few simple steps. Begin by accessing the post housing the photo you wish to remove, then locate the three-dot menu associated with the specific image and click on Delete post. This action promptly eliminates the selected photo from your post.
Can You Add a Photo to the LinkedIn Post after Posting?
Once a post has been shared on LinkedIn, you can’t add extra photos directly to it. However, it’s worth noting that you can still edit the post itself, allowing you to include more text if needed.
How to Post Slides on LinkedIn?
Adding slides and posting them to LinkedIn is just as easy as on other social media platforms like Facebook or YouTube:
Here’s how to post slides or a carousel on LinkedIn:
1. Go to your LinkedIn homepage.
2. Click “Start a post” at the top.
3. Write your main text content for the post.
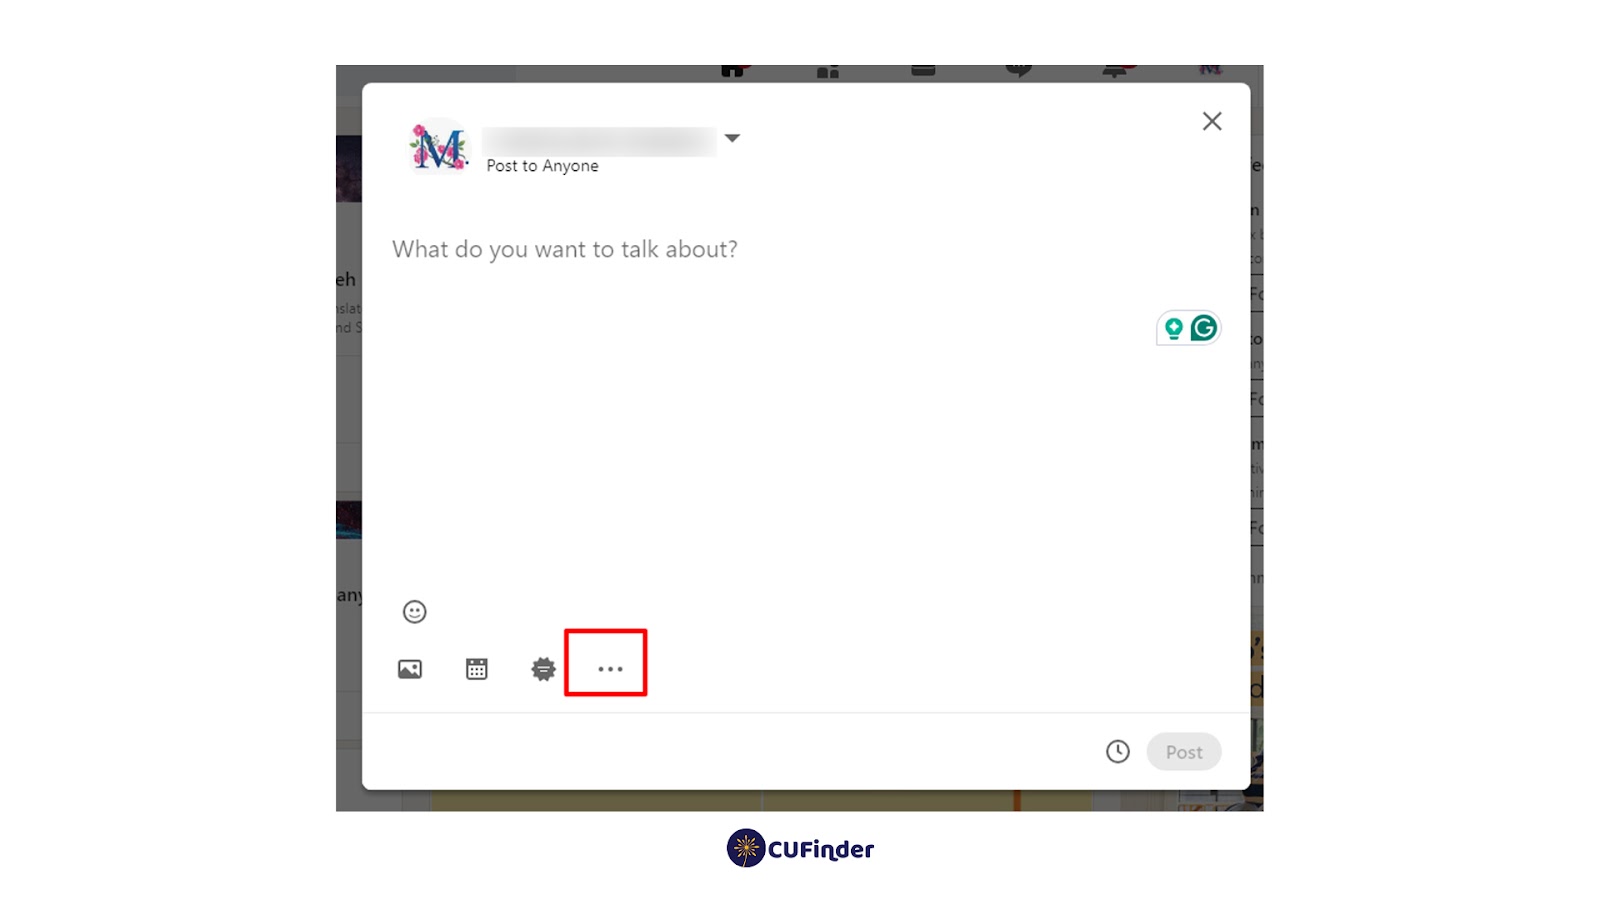
4. Click the three dots icon.
5. Select the document icon to attach your PDF, PowerPoint, or .DOC/.DOCX file.
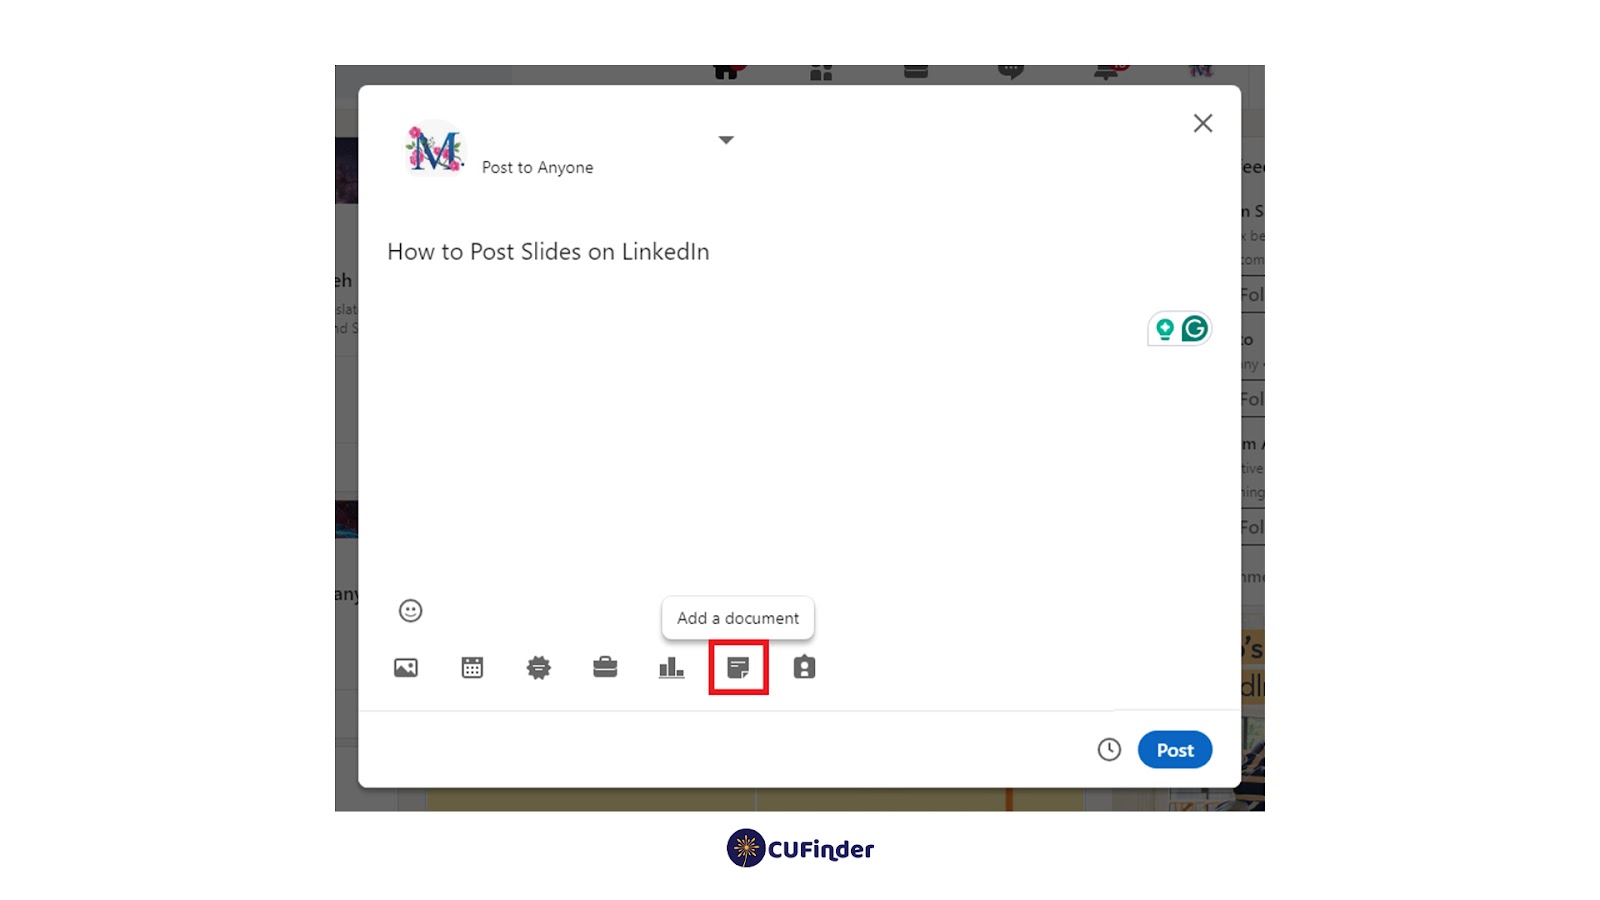
6. Upload your document, give it a title (which others can see), and click “Done.”
7. Finally, click “Post” and you’re finished!
LinkedIn Post Multiple Pages
While LinkedIn doesn’t inherently accommodate the posting of multiple pages within a singular post, there are alternative methods to present multi-page content. Consider either crafting a multi-image post or individually uploading each page as separate images within a carousel post to effectively convey your message across multiple visuals.
Quick Guide on How Do I Reorder Photos in LinkedIn Posts?
After adding top LinkedIn images or photos to your post want to share, you can easily rearrange or change them:
Here’s a quick guide on rearranging multiple photos: Click the reorder icon and drag it to the left of the photo you want to reorder.
FAQ
How do I arrange multiple photos on LinkedIn?
LinkedIn allows you to add multiple photos to a single post, but it doesn’t provide tools to arrange or organize them within the post. When you create a post and attach multiple photos, LinkedIn will typically display them in a stacked format. You can add captions or descriptions to each photo individually, but arranging them in a specific order or creating a collage-style layout isn’t a built-in feature. To create more complex layouts or arrangements, you may need to use image editing software to prepare your images before posting them on LinkedIn.
How do I edit a LinkedIn Post and remove a picture?
To edit a LinkedIn post and remove a picture, follow these steps:
- Find Your Post: Log in to your LinkedIn account and go to your profile or the page where you posted the content.
- Locate the Post: Scroll through your feed or navigate to your “Activity” tab to find the post you want to edit.
- Click “More” or Three Dots: In the top-right corner of your post, you’ll see a “More” button represented by three dots (•••). Click on it.
- Edit Post: From the dropdown menu, select “Edit post.” This will open the post editor.
- Remove the Picture: To remove a picture from your post, click on the image you want to delete. An “x” icon will appear in the top-right corner of the image. Click on the “x” to delete the image.
- Save Changes: After removing the picture, you can make any other edits to your post if needed, such as updating the text. Once you’re done, click the “Save” or “Save Changes” button.
- View Updated Post: Your post will be updated with the changes, including the removed picture.
Keep in mind that while you can edit the text and remove images from your LinkedIn posts, you cannot add new images or change the order of images in a post after it’s been published.
How do I add a picture to an already posted LinkedIn Post?
LinkedIn doesn’t provide a native feature to add new pictures to an already posted LinkedIn post. Once you’ve published a post, you can’t modify it to add new images or change the order of images. LinkedIn posts are designed to be static once published.
If you want to share additional images or content related to your previous post, you’ll need to create a new post with the additional content. However, you can refer to LinkedIn’s Help Center or check their current interface for any updates or changes to this feature, as platform features and capabilities can evolve over time.
CUFinder Academic Hub, Ultimately Free!
These comprehensive PDFs are your key to mastering the art of professional networking, personal branding, and strategic content creation on LinkedIn.
Click here to Download these ebooks for free!